
Recording Setup
To help you prepare for your recording, this section will provide tidbits and technical guidance.
| Camera Positioning | Lighting | Background | Final Check |
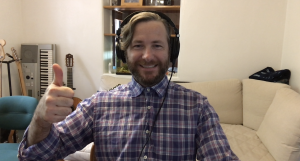
Positioning the Camera
With whichever camera (e.g., phone, webcam) you are using, here are recommendations on how to position the camera for an optimal frame for yourself in the video.
- Don’t sit too close or too far away from your camera.
- 1.5-2.5 feet away is typically a good distance.
- Frame yourself in the shot from about mid-chest to just above your head leaving a little bit of headroom so you are not cutting off the top of your head.
- Ideal camera placement is at eye level.
- Use a comfortable chair that doesn’t rock, make noise, or cause you to slouch.
Lighting
Lighting can help set the mood of the recording. Softer lights will have a more calming effect. But the goal always is to make sure your face is brightened enough for people to see clearly.

To help:
- Place a lamp on each side of your computer monitor with the light shining on you.
- Beware of windows or light sources behind you that may cause you to be backlit.
Background
As part of the setup, what you have in your background can reinforce the image you are conveying or potentially support the topic that you are discussing.
In general:
- Check for any distracting visuals in the background of your shot (e.g., television on, kids playing, windows, clutter, etc.).
- A background with minimal distracting items is best.
- If recording with Zoom, you are able to use a virtual background. You may want to do this for privacy reasons or to supplement the topic that you are talking about. The virtual background could be a PPT slide, and can be, for example, a location that you are providing more information about.
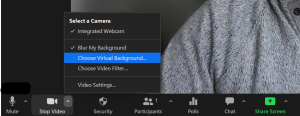
To change your background in Zoom, click the expander next to “Stop Video” and then click “Choose Virtual Background”.
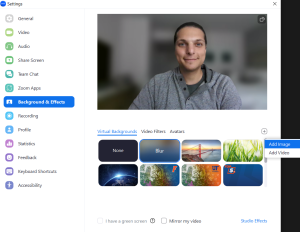
You can choose one of the default Virtual Backgrounds or upload your own Virtual Background. To upload an image for use as a Virtual Background, click the “+” button and then click “Add Image”
Final Check
Now that you have successfully set up for your recording, here are some final tips for the preparation. Again, if you need any assistance, please feel free to contact your instructional designer or video team representative.
- Record a test video clip of yourself lecturing to check audio and lighting levels.
- Make sure you have space on your hard drive or access to the cloud for cloud recording.
- Turn off or silence your phone.
- If you are going to be capturing your computer’s screen, make sure that your screen is cleaned up and properly arranged before the recording.